
Before you commit to a professional home energy assessment to learn your home’s energy score, you might want to consider taking the DIY route. Now you can’t perform your own home energy score without a license, to satisfy local government requirements. But you can assess your own home to look for improvement opportunities before the licensed assessor arrives. During a DIY assessment you will walk through your home, noting what you’ve inspected and whatever issues you uncovered along the way. This will help you prioritize the easier problems so you can make repairs or updates before you call in the professional, which can potentially save you time and money in the long run.
But what if you live in a new home? And what’s the point of getting a home energy score, anyway?
Keep in mind that home energy technology is evolving rapidly, so even newly constructed homes sometimes have room for energy-saving opportunities. Also, it’s the law in Oregon if you want to sell your home. As of 2018, the City of Portland required professional home energy assessments for the majority of homes listed on the market.
Doing a DIY assessment is not a replacement for the professional version, but it will provide you with some advanced knowledge about what you might be facing in terms of repairs and updates. And it can save time for the professional who comes in to do a more thorough evaluation.
Check and Fix Air Leaks
Reducing air leaks and drafts in your home can potentially save you up to 10%-20% on your energy bills each year. Most people also find that their home is far more comfortable to live in after spotting and fixing air leaks.
Spotting Air Leaks
Here is a list of areas to check for air leaks when doing your DIY home energy assessment.
- Baseboards
- Windows
- Exterior doors
- Lighting and plumbing fixtures
- Light switches and electrical outlets
- Fireplace dampers
- Outside – wherever two different construction materials meet
Sealing Air Leaks
When you discover gaps, holes, or cracks around wiring, outlets, faucets, or pipes, plug and caulk or insulate as appropriate. Other prime places to check and fix are the mortar around fireplace bricks and stones and the home’s foundation, windows, doors, and siding. Remedy these problems with caulk or weather stripping. Read our more comprehensive article about the advantages of proper air sealing here.
Evaluate Ventilation
When considering ventilation in a home, most people think of exhaust fans and dryer ducts that funnel indoor air pollution and unwanted heat outside. But let’s not forget backdrafts from combustion appliances like furnaces, gas appliances (water heaters, clothes dryers, ranges and ovens, fireplaces, wood), coal-burning stoves, and space heaters.
Backdrafting occurs when exhaust fans pull in gases from combustion appliances, increasing carbon monoxide levels indoors, leading to an unhealthy, and sometimes even dangerous, home environment.
Home heating sources that run on propane, fuel oil, natural gas, or wood must have adequate air supply. Check the City of Portland’s building codes to make sure you’re up to speed on the minimum unobstructed area around outdoor and return air ducts or openings for a forced-air warm-air furnace.
You can generally determine poor draft problems with appliance burners or vent collars when you see burn marks or soot surrounding them or when there’s visible smoke in the area.
Check Insulation
Over time, a home’s insulation can wear down and become ineffective. Usual culprits are age of the insulation, harsh weather conditions, or critters that crawl into insulated areas and either destroy it or make it a home.
Checking the condition of your insulation is essential when evaluating your home’s energy efficiency, especially if you live in an older home. Learn about the best kinds of insulation for homes in Portland.
Attics and Crawlspaces
Attics are out of sight and often out of mind. But holes and leaks, along with inadequate insulation in an attic can greatly impact a home’s energy efficiency. Consider the following when evaluating the condition of your attic or crawlspace.
- Exterior attic vents. Make sure these are not blocked by insulation to allow for optimum air flow.
- Holes or gaps around electrical boxes. Fill these in with a synthetic, flexible rubber caulk to allow for shrinkage and swelling due to weather changes. When caulking and filling around heat-producing devices and chimneys, be sure to use non-combustible caulks and sealants.
- Vapor barrier. If there is no vapor barrier under the attic insulation, add some. You can use sheets of plastic, tarpaper, or butcher paper on fiberglass sheets.
- Attic and crawlspace hatch. Check for weatherstripping and a close fit when the door is shut. If any filling is needed, use an expanding foam caulk.
Walls
Assessing the condition of insulation behind finished walls is not easy. Here are some steps you can take.
- Cut the power. The first and most important step is to turn off the circuit breaker or remove fuses. To ensure you don’t have any hot outlets, plug in an electrical device. If it doesn’t work, you’re good to go.
- Remove cover plates. Unscrew cover plates from outlets.
- Probe behind the wall. Use a long, thin object to poke around behind the wall, like a screwdriver or dowel. If you feel some resistance, you’ll know there’s insulation in the area. If you use an object with a hook on end, you’ll be able to see what kind of material is behind the wall.
What this method won’t do is tell you how much insulation you have behind a wall, if the whole wall is covered, or if it has settled anywhere. The only way to accomplish this is to have a thermographic inspection done.
Inspect Heating and Cooling Systems
Heating and cooling systems should be inspected annually, or according to manufacturers’ recommendations.
Routinely check the filters in your forced-air furnace and replace as needed, usually every month or two. Keep an extra eye out during times of high use, like during colder months, or if your home has less-than desirable air quality. It’s a good idea to have a professional cleaning done on the furnace annually.
Consider replacing any furnace over 15 years old for a more energy-efficient one. While the cost might seem hard to justify, it will wind up saving you money in the long run by reducing your energy consumption.
You can spot a leak in an air duct by looking for dirt streaks near the seams. Seal these with duct mastic. For pipes or ducts located in unheated spaces, wrap with the recommended R-Value 6 insulation.
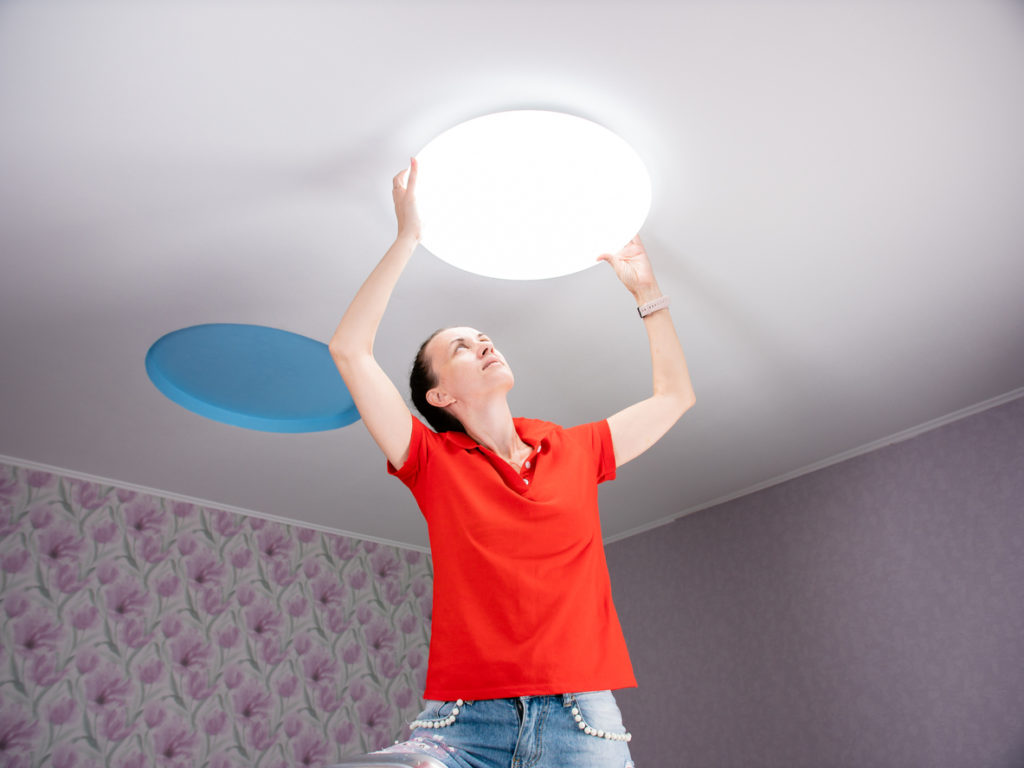
Examine Lighting
The energy used to light a home comprises about 15% of a home’s total bill.
A good place to start when assessing the lighting in your home is lightbulbs. Consider replacing regular incandescent lightbulbs with LEDs (light-emitting diodes) bulbs or energy saving incandescents.
What to Look for When Buying LEDs
When shopping for LEDs, forget everything you know about lightbulbs. These energy savers and traditional incandescents are not created equal. Here are some things to keep in mind.
- Look at lumens. Lumens (LMs) indicate the brightness of an LED bulb, and while they may be represented in watts on packaging, their numbers run far lower than incandescents. For example, a 60-watt incandescent translates to an 8-12 watt (800 LMs) with an LED. The LED equivalent of a 100-watt incandescent is a 16-20 watt (1600 LMs).
- Think about color. LEDs generally come in four basic colors: soft white, warm white, bright white, and daylight. Considering where each LED will be and buying accordingly will not only help create the best mood in each setting, it will also save on your energy bill. Learn more about the differences between cool and warm light.
- Be prepared to pay more up front. LEDs still cost more than incandescents, but since they first hit the market, they’ve come down in price. Most are right around $5 ow. Think about long-term savings: anywhere from $10-20/year on lighting alone.
- Let them breathe. One of the reasons LEDs last so long is due to the way they disperse heat. Put an LED in an enclosed light fixture, it will overheat, and you’ll shorten its life span by a lot.
- Check for dimming capability. Have older dimmer switches in your home? Some LEDs will dim, but none are made to do so. You can try different brands and experiment to see which one(s) will. If you don’t find any that work, you can always return them (keep your receipt!) and install a newer dimmer switch that’s compatible with LEDs.
Appliance and Electronics Usage
When doing a home energy assessment, take a look at the types of appliances and electronics you have and how you and others in your home use them. By both estimating their energy use and considering the following strategies to reduce their energy use, you can make your home more energy-efficient.
- Unplug items when not in use. This will prevent phantom loads of electricity.
- Change the settings or restrict use. By setting appliances and electronics to lower settings or becoming more conscious of when and how they’re used, you can impact energy usage and your bill.
- Purchase a new, more efficient product. Buying more up-to-date appliances and electronics built with energy efficiency in mind will go a long way in keeping energy use and costs down.
- Utilize smart home energy management systems. These computer-based systems are designed to monitor and control to optimize overall consumption of devices in the home.
Making a Whole-House Plan
After you’ve completed your DIY home energy assessment and have determined where your home is losing energy, make a plan. Here are a few considerations.
- Calculate how much money you spend monthly and yearly on energy.
- Determine your overall budget.
- Determine where you are losing the most money on energy.
- Compare potential updates and repairs against how long you plan to stay in the home (How long will it take for the investment to pay off? Will it significantly increase your market price when you sell?)
- Decide which projects you can do yourself and which require a professional, based on desired outcome, your budget, and your time.
- Check with Portland General Electric and Northwest Natural Gas to see what kinds of discounts they offer for energy efficiency updates.
Professional Home Energy Assessment
After you’ve gone through your DIY home energy assessment, it’s time to call in a professional, especially if you plan to put your home on the market. Not sure where to begin? Read our article “Why Get a Home Energy Score Before Selling a Home?”